Getting Started With Your ChompSaw!
Thank You For Being Here
We're so excited to get you building! This guide will walk you through setting up your ChompSaw, working with different types of cardboard, and troubleshooting any hiccups so you can get right to the fun part — making stuff!💡
Getting Started with Your ChompSaw:
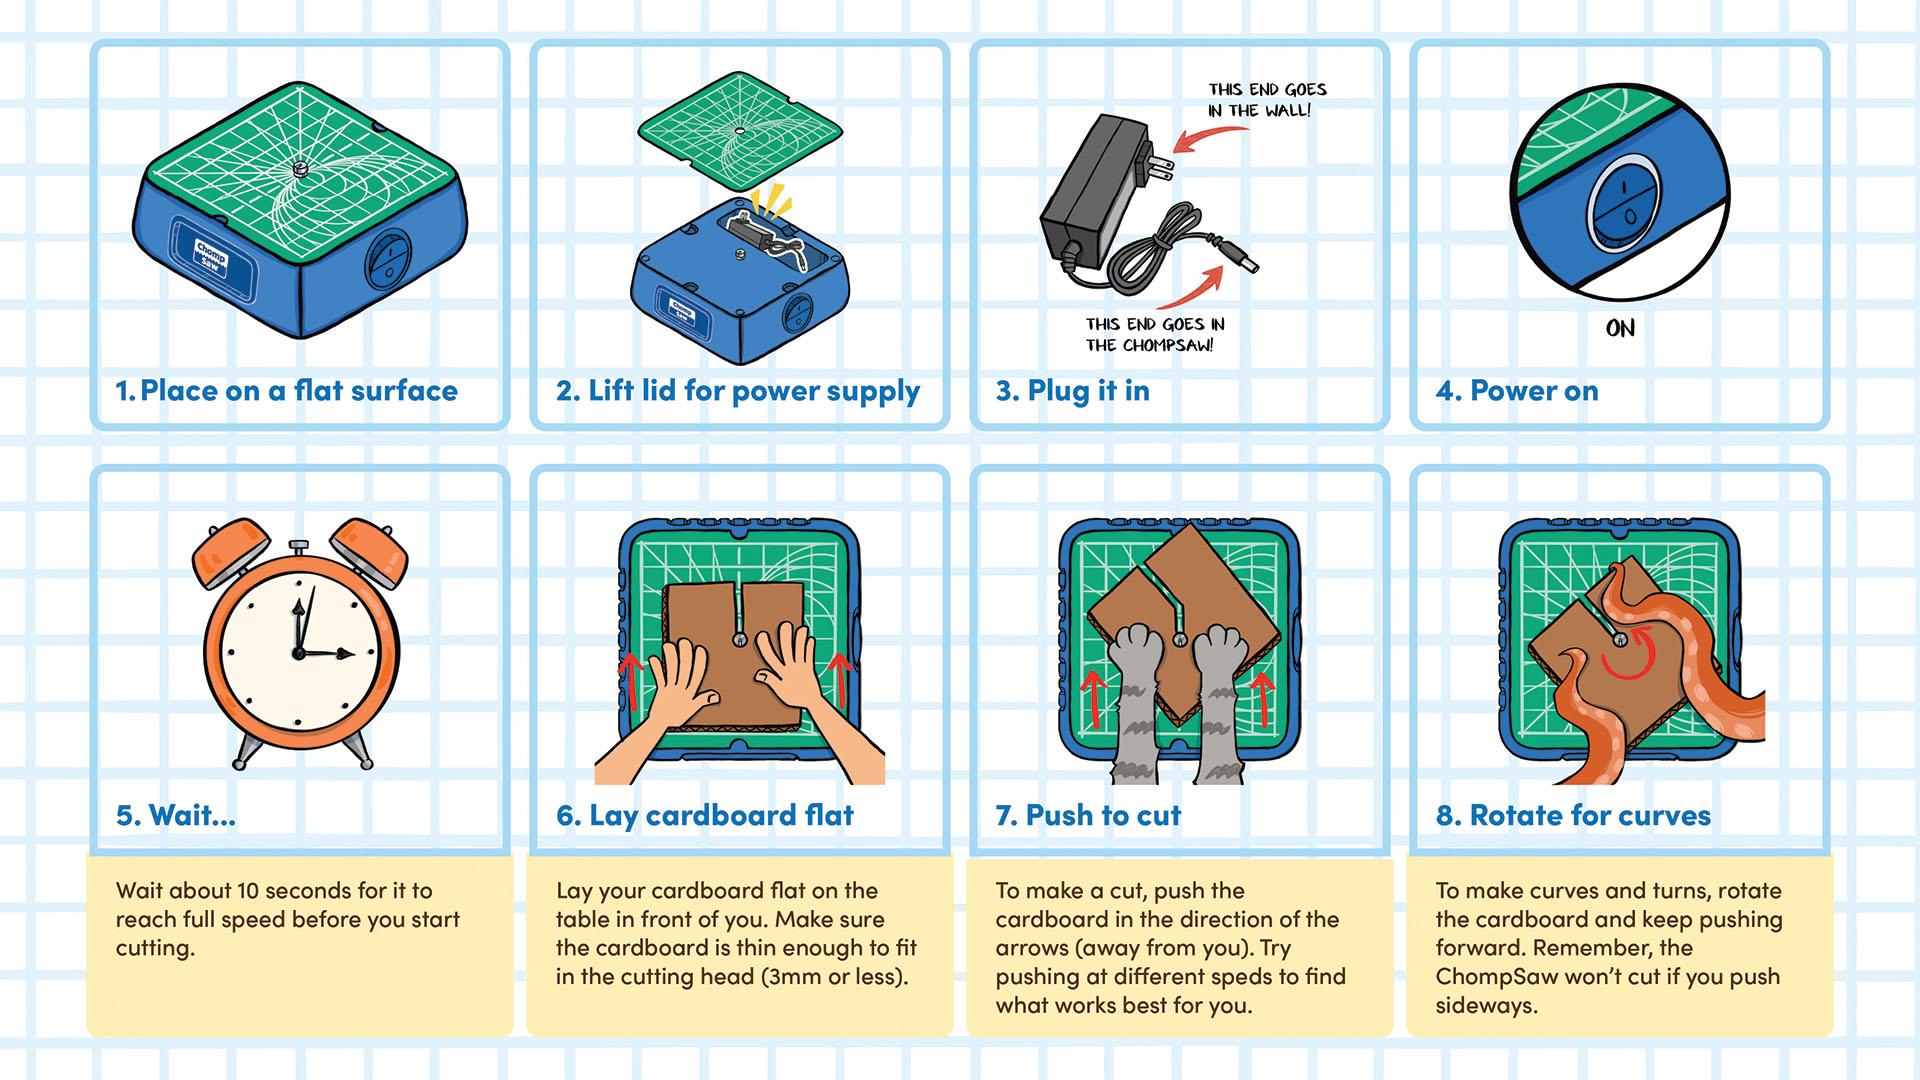
You just got your ChompSaw, so the first thing you’ll want to do is:
- Find a Workspace: Set up on a flat surface near an outlet.
- Locate Your Power Supply: Your power cord is stored under the lid of your ChompSaw! Plug it in and you're good to go!
- Check out our video tutorial below for a step-by-step walkthrough of how to use your ChompSaw. For more detailed instructions, this link will take you to our ChompSaw learning page where we’ve shared everything there is to know about owning and operating a ChompSaw!
Working With Cardboard:
To guarantee the ChompSaw is completely kid-safe, we've designed your machine to only cut cardboard under 3mm thick (think your average Amazon box 📦). Keep in mind, not all cardboard is the same, so here are some tricks for sourcing and using the cardboard you have on hand!
Choosing the Right Cardboard:
While we know it sounds technical, B flute cardboard (roughly 2 pennies tall) is the perfect material for your ChompSaw. Most of the boxes we get in the mail are around this thickness, but occasionally you’ll find some that are a bit too thick for easy cutting. If you run into a box that’s difficult to push through your machine or that gets stuck in the cutting head, here are a few things you can try to make it chomp! 🪚
- Score It! Draw out your cutting path, then use the rounded edge of your scoring tool (or even your hand) to press along your cutting path (this will squish your cardboard so it fits under the cutting head).
- Smush It! Jump or walk all over the entire piece of cardboard to pack it down and then free cut.
Where To Find Cardboard: 👀
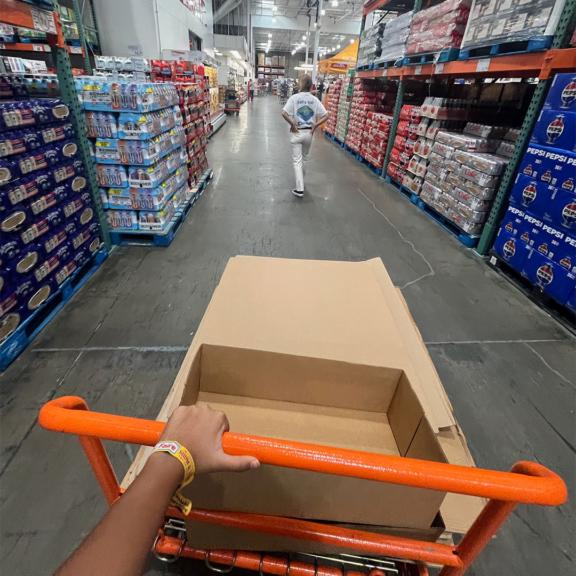
Cardboard is just about everywhere, but one of our favorite places to source cardboard is local big-box stores! Places like Costco, or your local grocery store, often recycle large, thin sheets of cardboard used for separating pallets and are happy to spare a few. Always ask for permission but we've found pallet separators to be a dream for large-scale projects (like Shark Tank sets! 😉)
Cutting Tips:
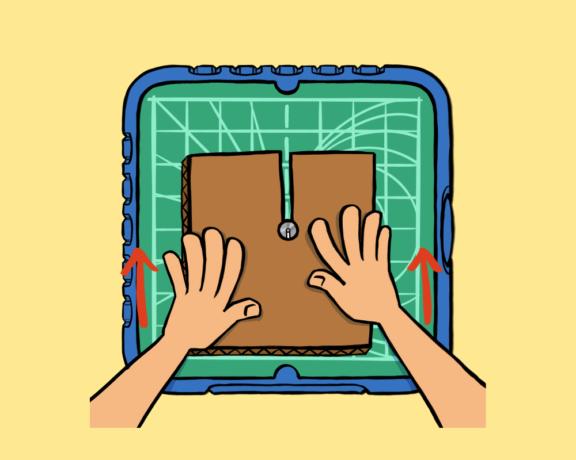
The ChompSaw only cuts in one direction, so you’ll want to:
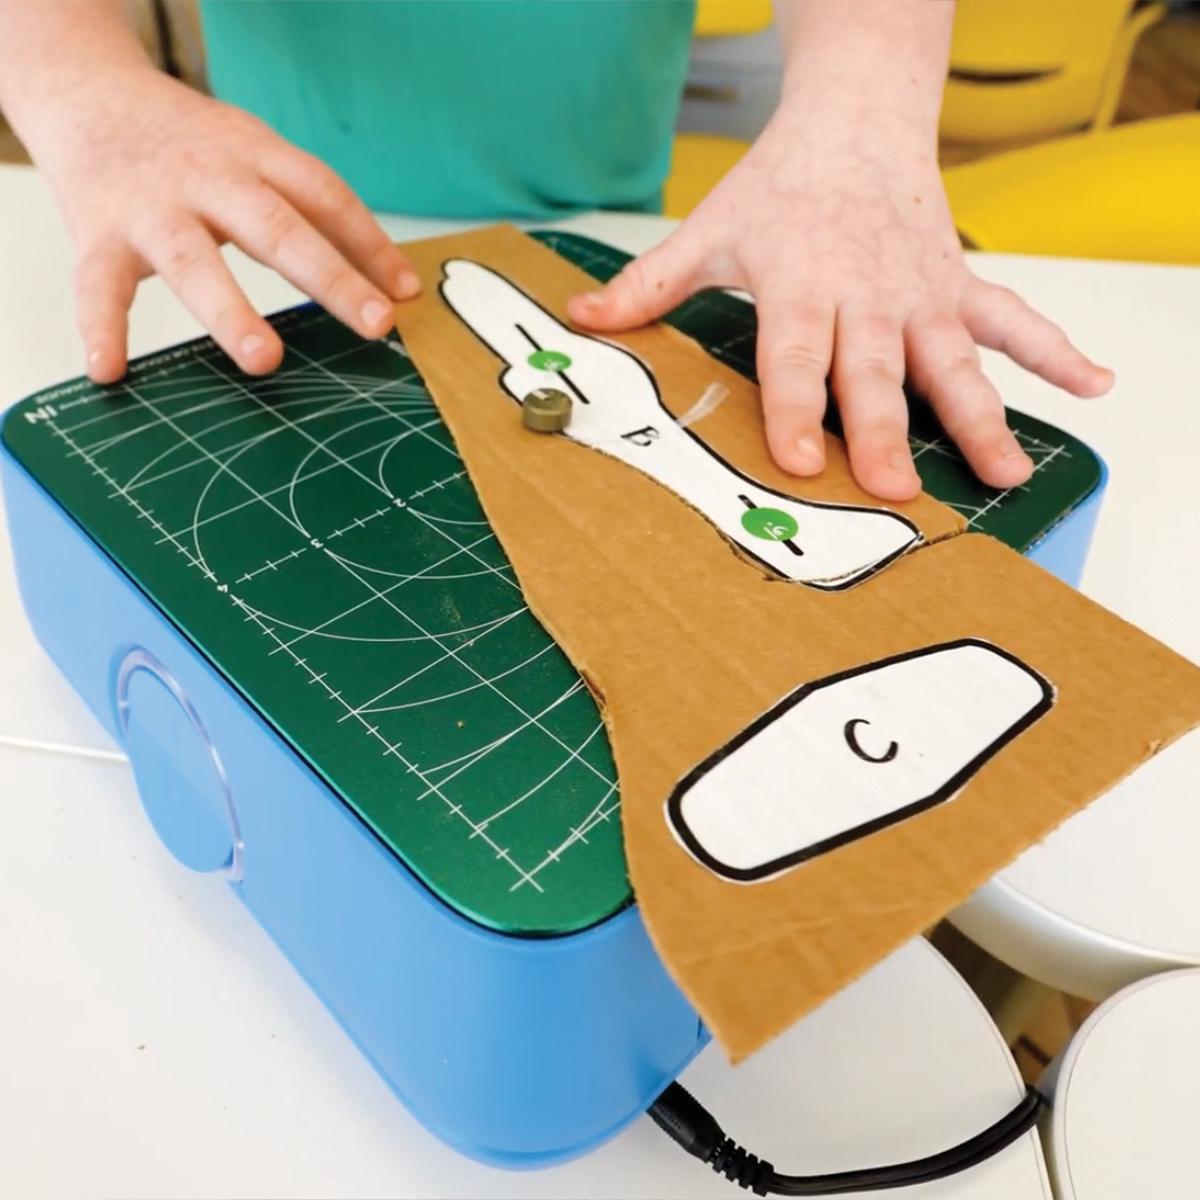
- Make sure the white line on your cutting head lines up with where you want to cut!
- Use both hands to apply steady, downward pressure when feeding cardboard into the saw: Like this👇
If your ChompSaw starts sliding around, this may be occurring because:
- The cardboard you're using is a bit too thick ...
- ... or you might just need to slow down! You might just be pushing with a little too much force (faster than the ChompSaw can chomp!) Fun Tip!💥 Some of our customers have found nonstick mats (like a yoga mat) to be a great way to stabilize the ChompSaw. There's a chance the rubber feet on the bottom of your machine aren't geeting a good grip on your work surface, which may be causing slipping! We're working on a more long-term solution, but a little tape can also go a long way with this issue!
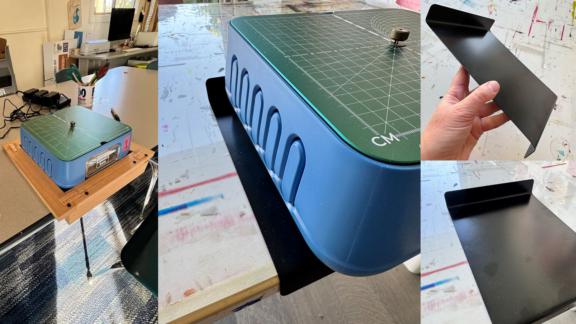
We’ve seen some amazing workshops built by our first customers using wood clamps to house the ChompSaw (not required, just super cool!) 👇